This is an actor blueprint. In the Viewport I just added a simple cube and scaled it down on the z-axis. Here I have several variables. Notice the floats “Speed” and “How high” are exposed. I clicked on the eye icon on the right. This enables you to set the speed on a per object basis. So every time you drop a platform in a level you can make it move to different heights and at different speeds. goingDown boolean is left at false. The other variables are set at BeginPlay based on where the platform is located.
Today we’ll talk about how to use the progress bar in your widget Blueprint.
One way to do this would be to have three different parts:
The energy variable stored in your player character. (You could also store it in the Game Instance if you want the health to be the same on a new level).
An actor blueprint enemy that, when overlapped, casts to the player character and deducts, say 0.1 from the health float variable of 1. This blueprint could to other things to your player character such as temporarily change their material to be red or make them jump back.
The widget blueprint with the progress bar. The progress bar will have a bind function that casts to the player character to read the health variable.
See if you can do this on your own! I will go through it toward the end of class and do a recording.
Today we’ll learn how to die from bumping into a blueprint that kills you. We’ll also learn how to keep track of lives using a Game Instance Blueprint.
A Game Instance is something that will store variables that won’t change as you change or restart levels. You need to search for it under “All Classes”:
Then very importantly make sure you set it in Maps & Modes in your project settings. If you don’t do this none of this will work!
All I put in my game instance is one variable: KristinaLives. Set it to however many lives you want to give your player. Here I did 5.
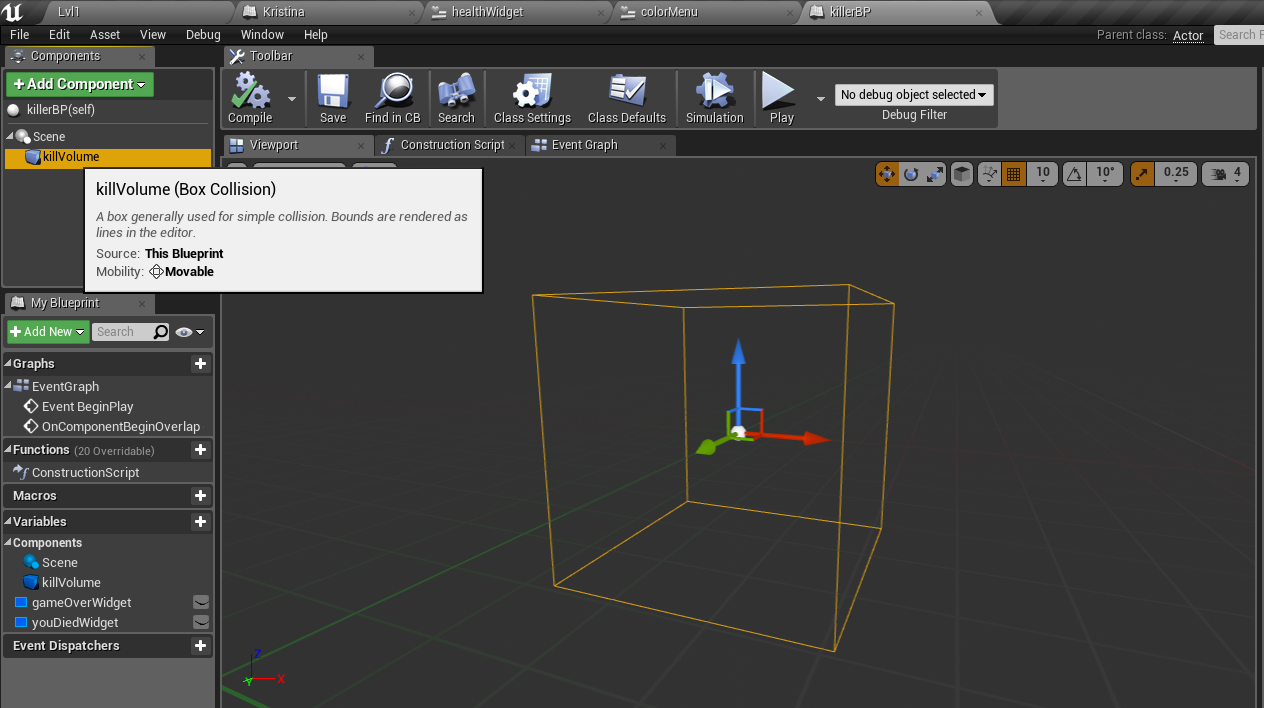
Then I created an actor blueprint named KillerBP. This is just a Box Collision volume that will kill my player character anytime it overlaps. I can set this to any size I want in the level.
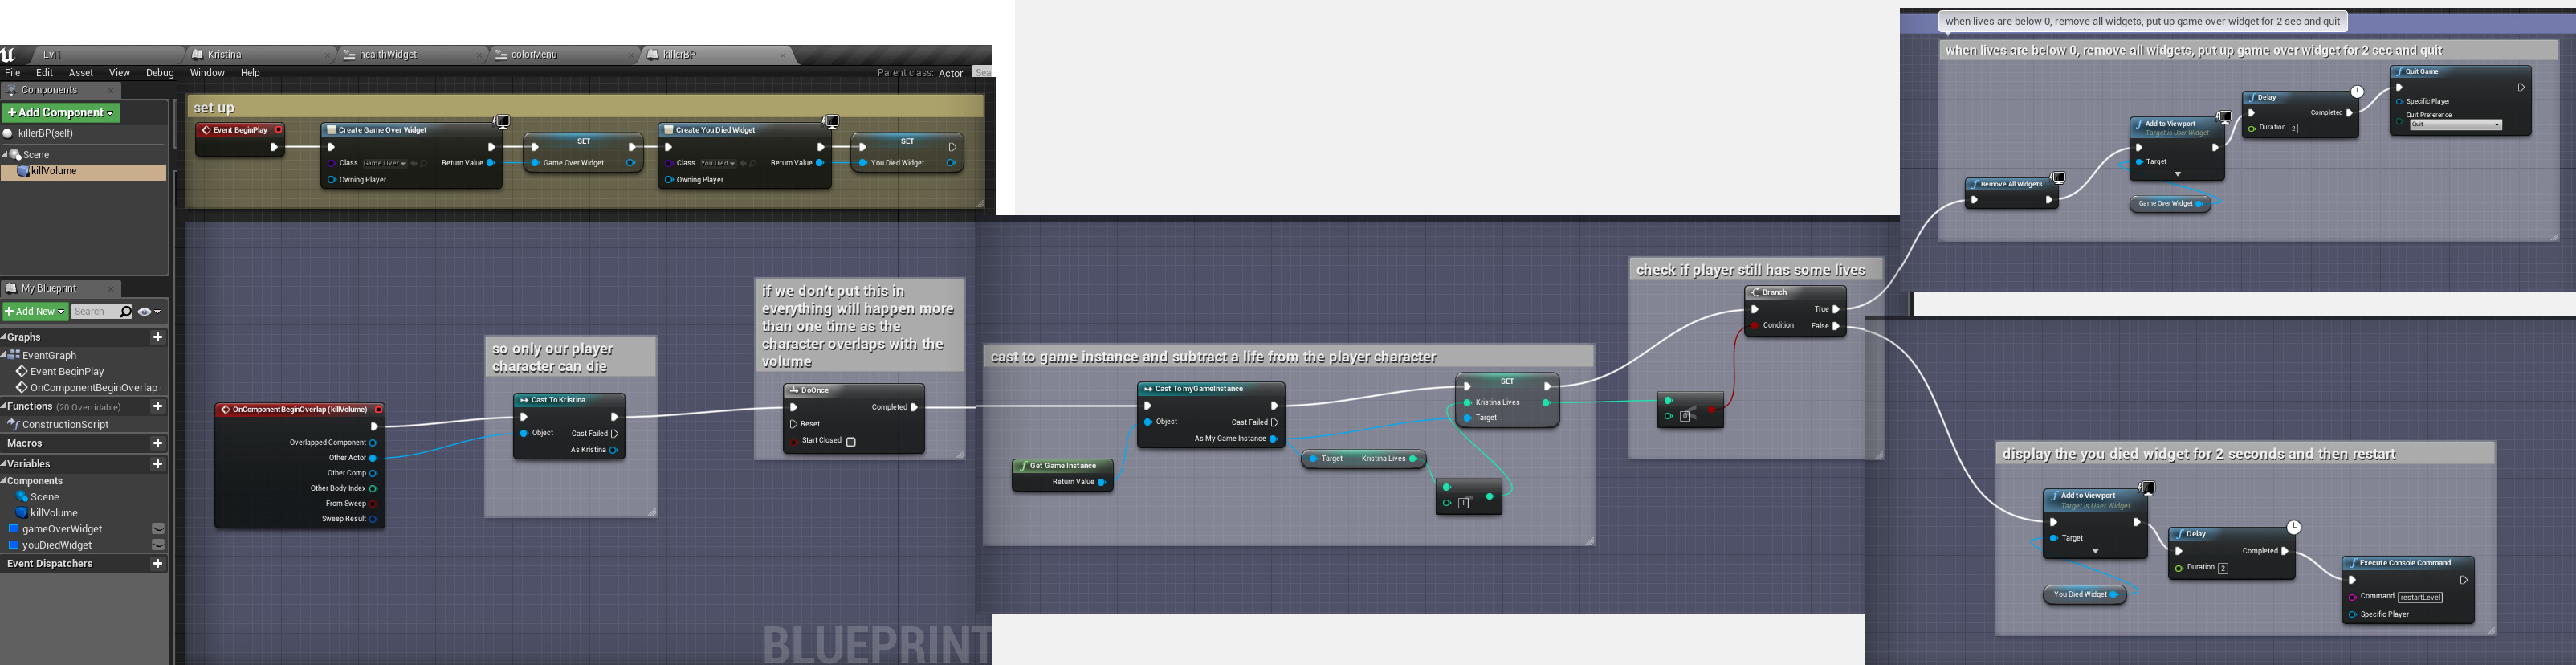
Here is the code for when the box is overlapped. I’m checking how many lives my player has left. If it’s more than or equal to 0, I just put up a simple text widget telling them they died and then I restart the level. If it’s less than 0, I remove the health widget, say game over, and quit the game.
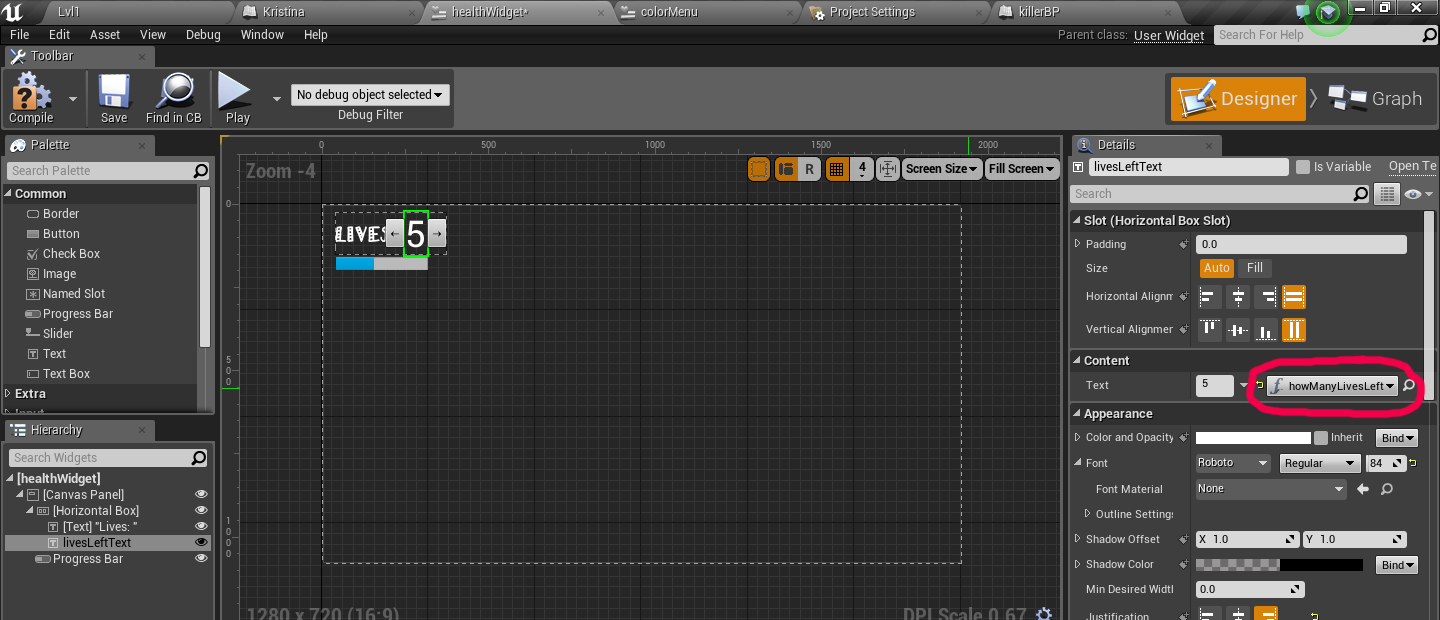
Next I created a widget to keep track of my player’s health and lives left. In the designer section I added a text box and in Content, Text, rather than typing in a number I clicked the Bind button to the right.
When you click Bind and then + it will create a function for you for that section of your widget. Here I’m casting to my game instance, pulling out the Kristina Lives variable and printing it to my widget.
TO FIGURE OUT: How do you make a blueprint that only takes away a little bit of health from the player (i.e. -0.1 from a health of 1) rather than killing them all at once? The blueprint would also check their health and when it’s 0 or less, then it would kill them. How do you visually represent this in the Widget using the progress bar?
Let’s make a widget that the player can interact with. Here I’ll make one where the player has two decisions. One will do nothing and the other will teleport the player.
Here is the basic setup. Notice I made the text a parent of its button:
In my actor Blueprint (any object in the level the character would overlap with) I create the widget (I named it Type, it could be called anything), pause the main game play, make it so we can use our mouse and set the input to be only for the UI (user interface, aka widget).
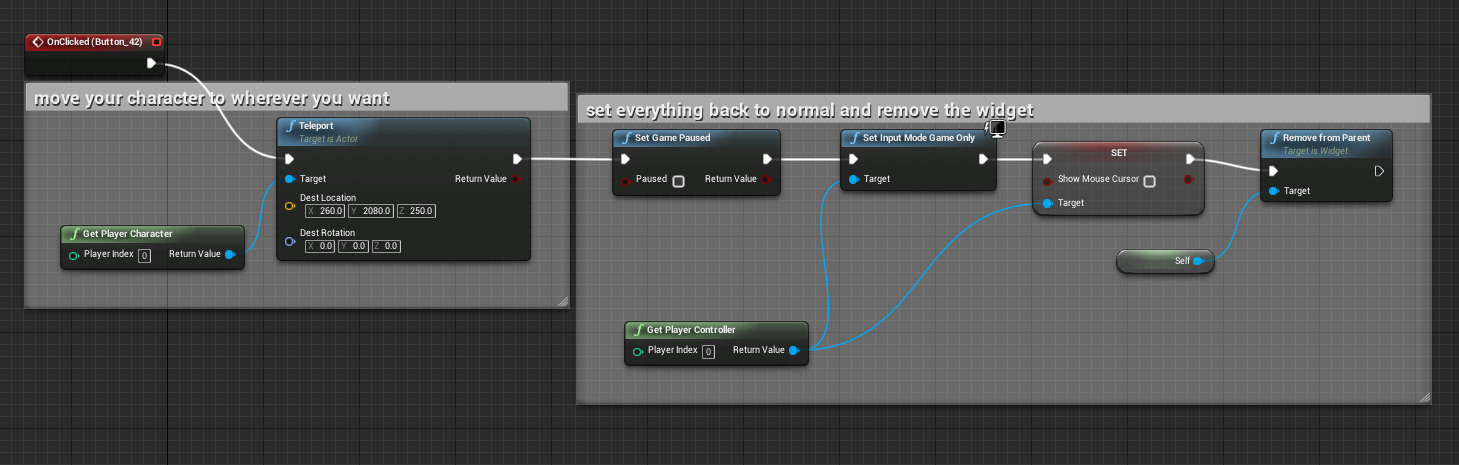
Then in the Graph section of the widget I first teleported the character and then set everything back up how it was so the character can keep playing. (You don’t need the ref to self in the Remove from Parent. It’s there by default)