Two basic things you can do with Matinee are animate actors in the level and also create cinematics with cameras. We will do both starting with a simple animation.
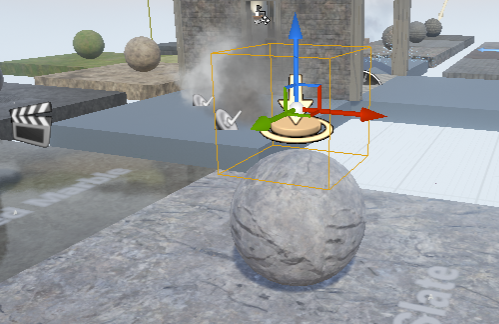
Here we have a ball in a starter content map. I placed a trigger on top of it. Then in the cinematics tab at the top of the viewport I added a matinee. You can see the actor icon to the left of the ball.
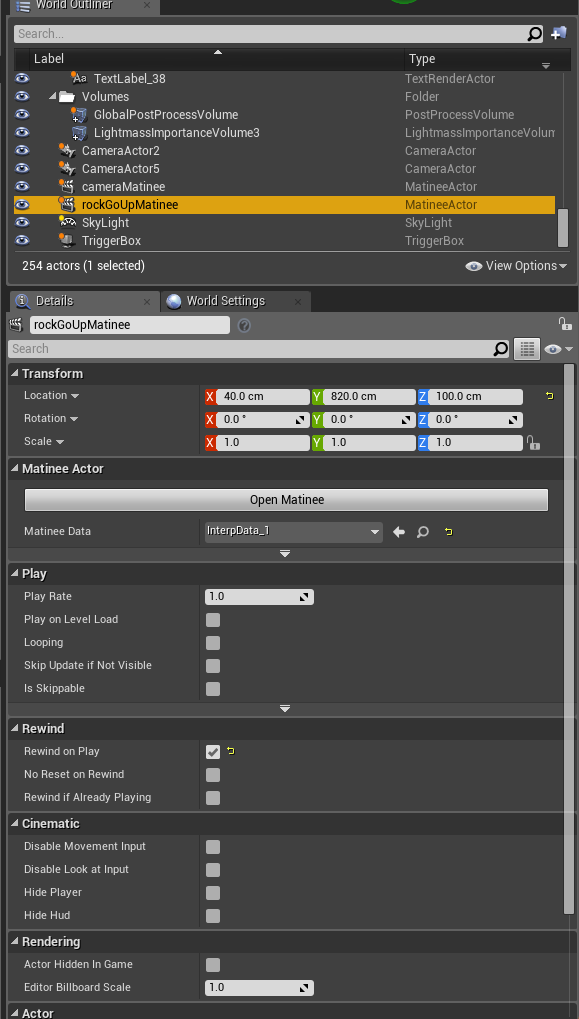
I called my matinee actor “rockGoUpMatinee” and set it to “Rewind on Play” so that it will play every time I hit the trigger.
In the matinee I right clicked on the “Tracks” section and added an empty group I called “rockGoUp.” To that group I added a movement track by right clicking on it and also I added the rock actor by having it selected in the viewport and going to “add actor” in the rockGoUp empty group.
Then, with the rock selected in its initial position, and the movement track selected in Matinee, I hit the enter key and set my first key frame (the red triangles).
Then I scrubbed ahead a bit, moved my rock up in the air, made sure it and the movement track where selected, and hit enter again to set the second keyframe. I moved to the end of the timeline, moved the rock down, selected movement and the rock and hit enter to set my last keyframe.
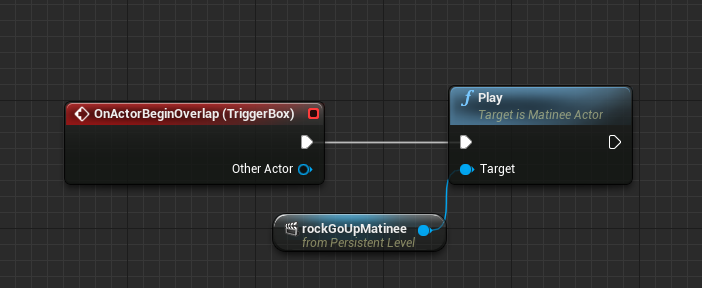
Lastly, in my Level Blueprint, with the trigger volume selected, I made a BeginOverlap event for it. Then with the matinee actor selected, I created a reference to that and then pulled out the pin and typed “Play” to get the play node to show up. Now, in the level whenever I step on top of that rock it will shoot up and then back down.
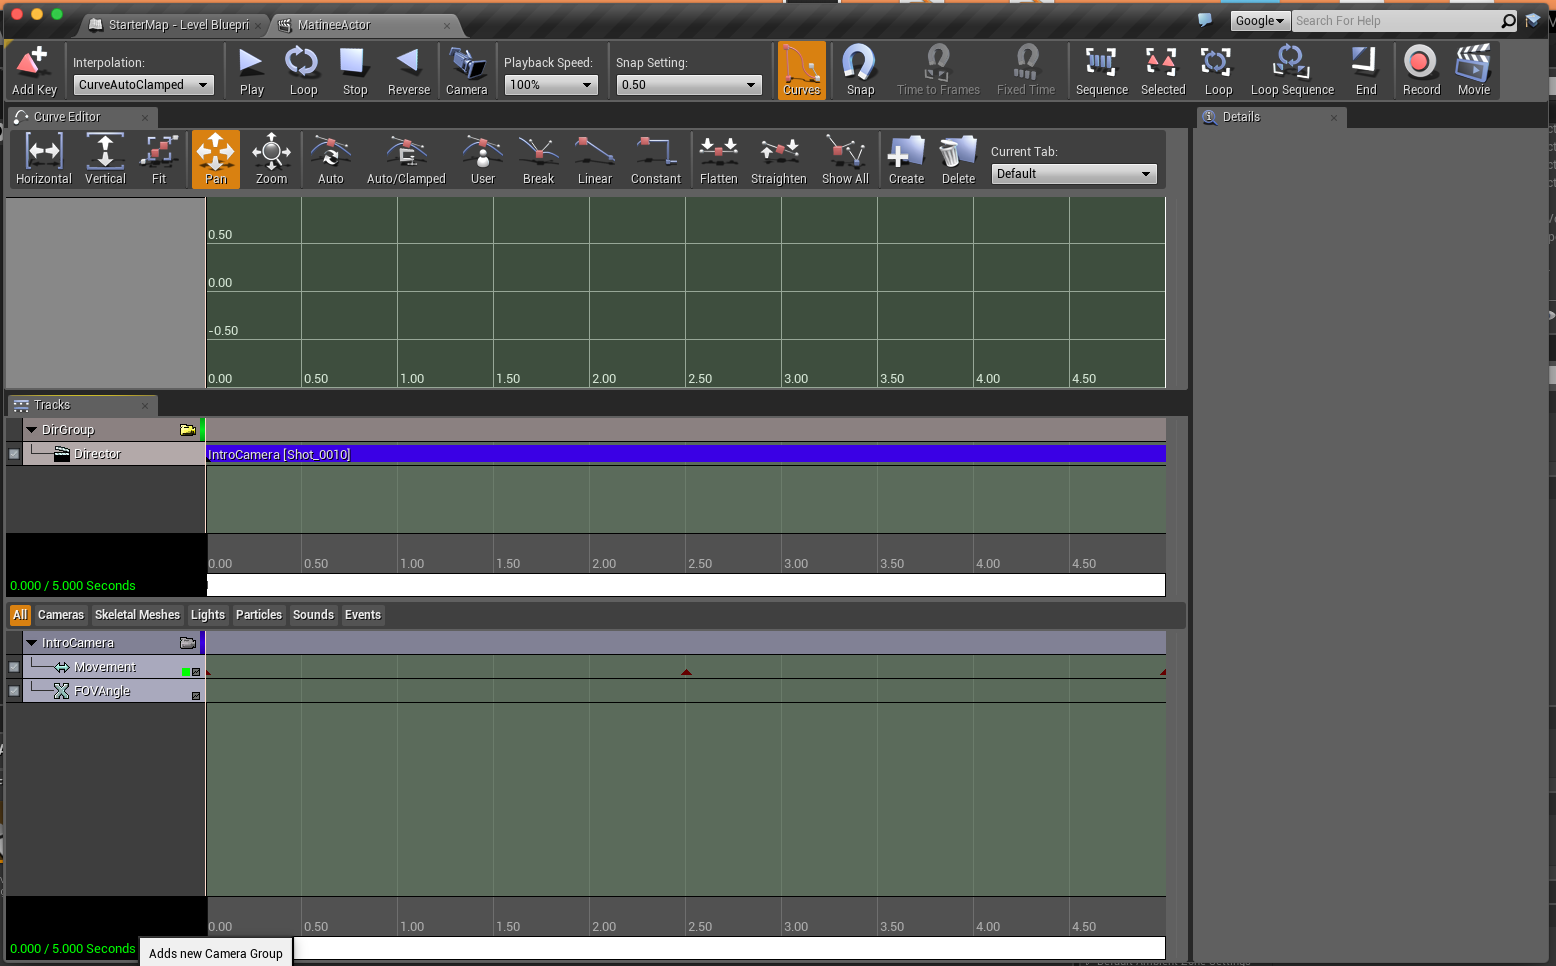
Next we can also create a cinematic intro to our level. To do this we create another matinee actor in the level. In the matinee I right clicked in the tracks section and created a camera group. This automatically creates a camera in the level (this doesn’t show up when playing). I named my camera group IntroCamera and right clicked on it to also create a DirectorGroup. Then, with my camera selected in the level and also the movement track selected in my camera group, I hit enter to set the first keyframe. Then I scrubbed ahead halfway through the movement track timeline, moved my camera across the level and then with the camera and movement track selected, hit enter to set the 2nd keyframe. I repeated those steps to set the third keyframe. Lastly, with the director group selected above, I hit enter and selected my IntroCamera group to be placed.
You can see how this looks in the level. The camera is on top and the matinee actor is below it. Also when you select a camera you can get a thumbnail of what it is viewing in the lower right hand corner of the screen. 
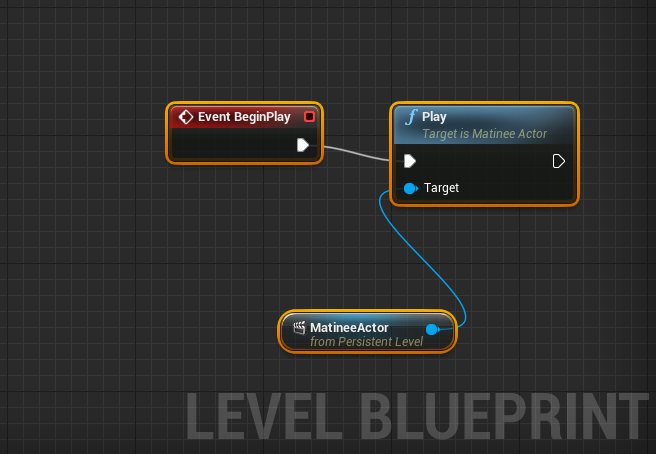
Lastly, we want this animation to start as soon as we begin the level and we do not want it to loop so we don’t need to set that up as we did above. Thanks to the director track, this animation will temporarily take over the ThirdPersonPlayerBlueprint and run from the camera’s point of view. With the MatineeActor selected in the level, I open my level blueprint, right click on the the grid and do “Add Reference to MatineeActor.” Then I pull out that pin and type play and connect the play node to an Event BeginPlay.
